This is something I have been wanting to make for a long time! I
hate the thought of spending over $80 for something that MIGHT or MIGHT NOT
work!! So, I decided to make my own for around $30 or less!
What you need to create your own weighted blanket is:
1) Fabric: You will need a front and a back. I got a yard of
each for a small blanket and had extra! My blanket measured 30" X
40"
2) Stuffing
4) Sewing machine
5) Scissors
6) Ruler or some sort of measuring tool
The fun part of this process
is picking the fabric! I went to JoAnn's because you can always get fabric on
sale or use your 40% off coupon! I also used my coupon to purchase the Poly
Fill Beads as they were a little more expensive than I thought they would be,
$9.99, for a 2-pound bag, without a coupon. I went with a
Minky fabric for both sides, as it is soft and similar to all of her current
blankets she sleeps with. I read online that it would be hard to sew with but I
had NO problem! My blanket measures 30"X 40", which is the size
of the nice baby blankets you find!
These next few steps seem very crazy and intimidating but I
promise I if I can do it SO CAN YOU!
One tip I read online was WAIT UNTIL YOUR CHILD IS ASLEEP OR AT
SCHOOL to do this project! I thought I can do this while my daughter plays in
the playroom and I draw some lines on fabric. We'll I was WRONG!! I turn around
and saw this!!
1.
The first thing you need to decide is what size you want your squares to
be
I choose 5-inch squares
as I knew my hand could easily fit down a 5-inch area and it also measured out
equally!
2. You
need to decide how much weight you plan on using in the blanket
Through lots of Pinterest
research, I found the weight of a blanket should be anywhere from 10-15% of
your child's body weight. I spoke to a physical therapist friend about
how much weight I should put in and she suggested 10% of my daughter’s weight
and because she is small she said to add an extra pound. So, this made the
weight that needed was 3.3 pounds.
3. Sew
both sides of your blanket
Make sure you sew your
blanket with fabric prints together. You will be turning this inside out after
you sew these two sides.
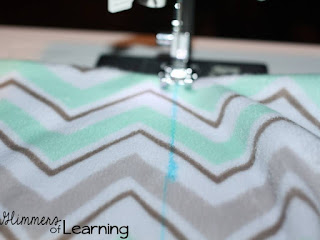
4. Turn your fabric right side out and sew down your blanket every 5" or whatever size you have decided your squares will be
I suggest not sewing all the way to the end of each row as you
will be folding over the fabric once completed to finalize your blanket.
Use your disappearing fabric marker or pencil to draw the lines down your
blanket. You can find the pen I used by clicking above on the tools
you need section!
5. Find the middle of your blanket and sew down the middle
I choose to sew down the middle so that I could easily reach my hand inside so I could push the beads and stuffing into place.
6. Figure out how much weight you will be putting into each square. You now need to divide it by the total number of square
I converted mine to oz as my scale didn't go as low for pounds
as I needed it. I used a food scale to do my measuring and converted using
Google!!
I per-measured at least five square totals out and placed them
into plastic baggies so the process would go quicker once I got started!
7. Now onto stuffing each square with stuffing and Poly-Fill beads
Once you have done the following steps it is time to start
stuffing! For each of your five (or more) rows, place the Poly Fill Beads in
and then a small amount of stuffing, making sure to push everything all the way
down to the bottom of that row. (Which is why I sewed mine in half) I
did this for all five of my rows and sewed across all at the same time! TIP: Use your marker and go
ahead and mark out all the lines where you are going to sew! This speeds things
up greatly! My pen had two sides, one which disappears by air and one with
water. USE THE ONE THAT DISAPPEARS WITH WATER SO YOU DON'T HAVE TO RUSH as my
air side disappeared rather quickly! If you use the water side you are able to
draw lines for your whole quilt now, which is helpful instead of measuring it
out while it was stuffed!
 | |
|
Measuring lines for the whole quilt |


Thank you soooo much for taking the time and energy to post this!
ReplyDeleteI can't weight (lol) to make one for my granddaughter Aria Reign.
Finding best back pain clinic in Brampton? So at New Hope, we provide Lower Back Pain treatment Brampton from experienced and skilled hands.
DeleteNice weighted blankets, I recommend you to check this website: Best electric blankets
ReplyDeleteOur premium weighted cover is best for kids moving. Youngsters who think that its hard to focus notwithstanding for the most limited time conceivable or who think that its difficult to nod off will profit by this tactile cover. If you want to know more, Please check out here: https://www.toppro10.com/top-10-best-weighted-blankets-reviews
ReplyDeleteFirst, the silk comforter promotes sleep, raises sleep quality with sedative effect. Silk protein contains 18 kinds of amino acids, 11 of which are necessary for the human body, so pure silk is good for skin, especially for sensitive skin, delicate infant skin and pruritus skin of the old. Silk Duvet Covers
ReplyDeleteI have bookmarked your blog, the articles are way better than other similar blogs.. thanks for a great blog! silk bedding
ReplyDeleteImpressive web site, Distinguished feedback that I can tackle. Im moving forward and may apply to my current job as a pet sitter, which is very enjoyable, but I need to additional expand. Regards. autism weighted blanket
ReplyDeleteShopping for kids bedding can be lots of fun for you and your children. Yet all the fun can turn into disappointment is you are not happy with your purchase once you begin using it. It gets even more disappointing when your kids love the bedding but it shrinks or tears, fades, stains easily or simply does not hold up to the wear and tear kids give their bedding. kids bunk bed with slide
ReplyDeleteThis comment has been removed by the author.
ReplyDeleteThe double stitch is similar to the alternate stitch, but instead of making two single crochets in one stitch, it spans two stitches. Insert your crochet hook in the stitch to be worked, wrap the yarn over it so you pull back a loop, then insert the crochet hook into the next stitch. https://mycrochetpattern.com/beginners/sc-back-loop-only/
ReplyDelete