The first thing I did when sitting down to plan was think of a theme. That was the easy part as winter has just arrived for us with some snow, finally! So I searched Pinterest as well as looked at what I already have in my home! I was an Early Childhood Special Education teacher for 10 years, so I have a lot of stuff! I think it is key to remember you don't need to spend a lot of money on teaching materials. You have a lot of materials already around your house and if you find some fun projects or activities see how much money that would cost you! My goal is to purchase almost everything I need from the Dollar Tree or somewhere where the cost can be low.
Here are my plans for my first week of Tot School!
You can see I added what I need to purchase, to make these activities work, while I was writing out my lesson plans.
The one thing I have learned this week is have everything ready to go BEFORE you sit down to work with your child! I needed to go get a few things and if I got up from our learning space she was DONE! So now I know!
One of my favorite activities to do during the winter is to build a snowman indoors!
This activity was a big hit! I did try showing her where the body parts were suppose to be located and as you can see the nose had other ideas of where it should go! Remember Tot School is suppose to be FUN so don't stress if your lesson or activity is not perfect!
BOOKS
Here are some books I already had around my house from teaching and/or books I have bought for my daughter. I really like the It is Snowing What Do I need to Wear interactive book
which I downloaded for free from Practically Speeching. This book is great because it's a fun and easy read and teaches and talks about what you wear on certain parts of your body; such as what do you wear on your feet? You can give your child two choices or if they are still really young just ask the questions and give them the picture to put on the page.
ART
As a teacher one of my favorite art projects in school was having my kids make a 3D Snowman. No two were ever the same and no matter what I could always make it resemble a snowman!
To make the snowman you will use the same amount of glue and shaving cream and then mix it up. The glue will allow it to stay on the paper and help all your other things stick to your snowman. I used googly eyes for the eyes, star buttons as buttons, pipe cleaners as arms, felt for a hat and ribbon for a scarf. I always pick up buttons in the $1 sections of Michael's Craft Store and JoAnn Fabrics because you can never have too many buttons!
I suggest giving your child a brush as this is a sticky project. But if they'd rather get the whole sensory experience, the mixture washes off with warm water easily! I was looking for a piece of art to add to our mantle so the night before I painted a canvas blue and we made our snowman on the canvas. At school we would use regular blue or colored paper, so the snowman stood out, and they always turned out awesome!
We
also did Circle Painting, which was done by putting paint on a paper
plate and using a toilet paper roll to dot circles on a white piece of
paper. While doing this we talked about the shape and colors we used
as well as counting how many circles were made, which can be tricky when
they make SO many circles!
We also made a snowman out of packing peanuts. I made this outline on my computer and then we glued packing peanuts on it! I already had packing peanuts that came in a Christmas present, but you
could also use cotton balls!
SENSORY PLAY
My daughter loves sensory play and so we made Silky Stretch Play Dough. I found the recipe on Pinterest and it is great because it is just TWO ingredients! You need conditioner and corn starch. I went to the Dollar Tree to buy my conditioner and it worked great! You mix 1 cup of conditioner and 2 cups of Cornstarch, mix together and play! Make sure to buy a conditioner that you like the smell of because the smell can be strong when you open the bag to play with it. I love this play dough as it does not leave your hands salty and it is very smooth! You can check out the original post of where I got the recipe and idea here.
FINE MOTOR
My
daughter avoids fine motor tasks like the plague! So whenever we need
to work on fine motor skills I always try to make it fun! I do think
it's important to practice straight lines, as this will help with
writing and forming letters down the road so I did make her practice
straight lines a few times! Not her favorite thing! :) Try using paint,
markers, crayons, high lighters or your finger in sand to mix up things
to keep them having fun while drawing shapes, lines and/or letters.
For Christmas we purchased my daughter this Melissa and Doug Bead
Sequencing Kit. At this point in time we are just focusing on having
her put the beads onto the pegs but in time we will work on the
sequencing and following directions! I love how this can grow with
kids! If you do work tasks with your kiddos at school this would be
awesome for that!!
SPEECH: Teaching H Sounds to Toddlers
This
week my daughter was focusing on H words. We have been working with a
speech therapist and these are words that we are targeting as well as
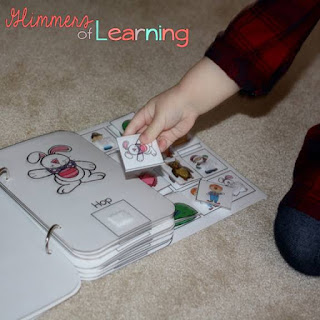
some she can say easily! I created this interactive book for her to use
while we work on the sounds. This is just a great way to have her
interacting and playing while working on speech! Right now I have
uploaded it to my TPT store for FREE as I want to upload a few more
things but haven't had the time yet! Download now if you want to get
this free and everything else that i upload will be included in your
free download, you will just need to re-download once it's been
updated!
CLICK HERE TO DOWNLOAD or click on the picture below!
ONE WEEK DOWN....LOTS MORE TO GO!
These are just a few of the highlights from my week! If you see
something in the lesson plans that I didn't explain enough please
comment and I will make sure to reply to you!! I am thinking next week
we will focus on snow! I hope we have some outside that we can bring in
to play with!


C91AD43F63
ReplyDeletedüşmeyen takipçi
swivel accent chair set of 2 on sale
A8021C163C
ReplyDeletesteroid satın al
Görüntülü Şov Whatsapp Numarası
puro satın al
DEBF2865BC
ReplyDeleteCanlı Show Whatsapp
Ücretli Show
Skype Show Sitesi