Build a Flower: Phonemic Awareness Activity

Follow my blog with Bloglovin

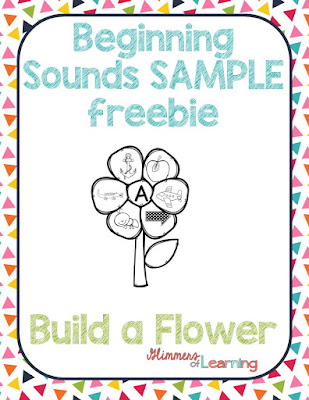
One of my favorite parts of my job is going into the Great Start Readiness Classroom (Four year old program). I love being able to still work with kids and create fun activities for them! This week in my small group I wanted to focus on beginning sounds and also create a fun craft! So this lead me to create this Build a Flower Game! 


I created this into a game but it could easily be used as a morning work, small group or even a quick unofficial assessment.  For my group I printed off three letter stems and the corresponding pictures.  Our group time is short and to save time I cut the petals prior to arrival. This can also be a great fine motor activity by having students cut out the petals on their own!


Each student in the group picked a letter stem and then I held up a picture one at a time and the students needed to name it, tell me the beginning sound and then the letter that makes that sound. Students then glued it to their flower and we continued until everyone had six petals. 


My centers contained 3-5 students so we did this activity together.  I have created two sets of printable petals for easy classroom use. 
  • one set have a page for each letter of the alphabet with six petals
  • One set has a page for each letter of the alphabet but this has 8 petals (two that do not belong)

 
This activity lends itself well to morning work and/or literacy time. Students can use the second set of petals, cut them out, and glue the six petals that have the same beginning sound as their letter. 


You can easily give all the students in your classroom a different letter and they will all turn out differently and then create a spring bulletin board!

https://www.teacherspayteachers.com/Product/Build-a-Flower-Beginning-Sound-Activity-2464849

Click on the picture or here to view this product! 


https://www.teacherspayteachers.com/Product/Build-a-Flower-Beginning-Sound-Activity-SAMPLE-2466311

0

A Week Before Easer!! Here Are Some Easy Prep Activities For You!

If you are anything like me Easter has snuck up on you quickly!  I wanted to share some of my print, laminate and go activities with you for easy planning this week! 

Inside my Easter Work Jobs Packet that can be found on Teachers Pay Teachers  included are: Matching (4 Activities, easy to hard), Color Matching, Letter Matching, Number Matching and Number Order (2 Activities, 1-9 and 1-20). 

My daughter isn't interested in the whole sit at the table and work so I have been tricking her with hiding items inside her sensory bins and then she will participate!  This might be a trick you can use with some of your learners!


Included in the packet you will receive this number matching activity, which is one of my daughter's favorites! 

Her favorite number is currently 8! Remember the key to work jobs is that the student should be able to do EVERYTHING about the task on their own!! If you haven't heard about work jobs check out my first post here.


https://www.teacherspayteachers.com/Product/Easter-Work-Jobs-TEACCH-Activities-1799307


Above is my Easter Work Jobs Packet which currently free on TPT, so rush to pick it up before I update and increase the price! Click on the picture or here to access the product on Teacher Pay Teachers! 


https://www.teacherspayteachers.com/Product/Easter-Egg-Counting-Books-Counting-to-12-and-Counting-to-24-2455907

I just finished my Easter Egg Interactive Counting books!  With these books students practice one to one counting as well as number ID and sight word number ID. You receive two books through purchasing this product: the first counts up to 12 and the second book the students practice one to one counting to 24! These books are such great addition to your unit and can support struggling learners! Students can either match using the number or the number word, depending on their ability!   This product will be marked down 50% for one day so go grab it now! 

I hope everyone has a HOPPY Easter! ;) 
0

How to Make an Awesome St. Patrick's Day and Spring Sensory Bin

I am so pumped about this sensory bin! I found the amazing idea from AndNextComeL. This is honestly one of the easiest and by far my favorite sensory bin yet! 


All you need for this sensory bin is:


1) Chickpeas: I used a total of six bags of Chickpeas that were 16oz each. I purchased mine at my local Meijer's for $1.50 a bag. The may also be called Garbanzo Beans.

2) Liquid Watercolor: I used ColorSplash that I bought offline at Walmart (1oz bottles). I am giving away two new sets of the six colors I used for this project through Rafflecopter! So sign up below to win!

3) Baggies: You can use zip lock baggies or even grocery store bags that you will use to mix the beans up


Take your beans and place them into your bag and squirt as much (or as little) of the liquid watercolor as you'd like! This all depends on the exact color you would like. For the yellow I squirted the whole 1oz bottle because I wanted a rich color! You could easily get away with making two batches of each color chickpeas with the 1oz bottles!


Shake the chickpeas and roll them around until they are nicely coated! I loved using the zip lock bags so I could make sure all my chickpeas had a nice coating of color!

Next lay them flat on some sort of paper to let them dry! 

Look at these awesome colors!  The beans dry REALLY REALLY fast! They were almost totally dry when I laid them onto the paper! I have a toddler so I wanted to make sure they were 100% dry before we started playing with them! 

Now it's time to ENJOY!!


 Slowly at first


Let the mixing begin!  

Such bright colors! I think I put too much watercolor on the purple ones!

What fun is it if you don't get inside! Yes I did see the orange one in her hair but that makes it REAL life! ;)

Having a ball!


 I love little toes!

Making sure there are no beans in her toes!

You can hide things in your sensory bin! I will be placing gold coins with letters on them into the bin as this is what our focus is currently with my 2 1/2 year old! You can hid or put anything into your bin: sight words, numbers, letters, pictures for vocabulary or speech, etc! 

Don't forget to enter to win your own set of Liquid watercolor below! 
 
When I went back outside this is what I saw! I thought this was so cool! That's how much I love this sensory bin! 


a Rafflecopter giveaway
4

Fun Ways to Incorporate Fine Motor and Speech During Easter


I was able to create this sensory bin for around $5.30 (I already had the container, which I picked up at Michael's Craft Store for about $3.99). I was able use this sensory bin for fine motor skills as well as speech activities!  I could have gotten out of the Dollar Tree for $3.20 but I loved all the cute Eggs they had so I bought three packages of eggs, which you could get by with only one package!

 I picked up my eggs, adorable Easter Tongs and Easter Grass (PAPER) at the Dollar Tree! When I saw the Tongs I knew that these would make a great fine motor task!

I thought of three different fine motor activities for you to use with this sensory bin! 

1) Use the tongs to pick up the eggs: great for practicing scissors skills
2) Hide objects inside the eggs and the students will have to use their fine motor skills to get whatever is inside out! Depending on their age they can match the eggs to put them back together! 
3) Use scissors to cut the PAPER grass or have the students TEAR the grass (tearing paper is difficult for those who struggle with fine motor skills)

 I love being able to use one toy or object for more than one purpose, this cuts down on transitions and me loosing her attention while transitioning to another toy or activity. We used this activity to practice speech (as you can see my daughter is watching my mouth and using tactile cues).
  • Labeling: Hide objects inside the eggs and have the student name what is inside
  • Categorizing: I love using mini erasers and they fit perfectly inside the eggs. Have students sort based on categories such as food, vehicles, animals, etc 
  •  Naming or Identifying colors: Have students name the color egg or ask the student to find a specific color egg
  • Spatial Concepts: Once the student picks their egg have them place it in, under, on top, etc. A great way to get some movement into your activity for those who need to move!
  •  Simple requests such as: open, please, more, my turn, thank you, etc (A great time to use PECS by asking for specific colored eggs, big/little, etc.)
  • Social Skills: If you are in a group therapy session your student's can work on social skills such as: sharing, turn taking, eye contact, manners, etc!
    ·
0

How to Make a Weighted Blanket

This is something I have been wanting to make for a long time! I hate the thought of spending over $80 for something that MIGHT or MIGHT NOT work!! So, I decided to make my own for around $30 or less! 

What you need to create your own weighted blanket is:
1) Fabric: You will need a front and a back. I got a yard of each for a small blanket and had extra! My blanket measured 30" X 40"

2) Stuffing
4) Sewing machine
5) Scissors 
6) Ruler or some sort of measuring tool


The fun part of this process is picking the fabric! I went to JoAnn's because you can always get fabric on sale or use your 40% off coupon! I also used my coupon to purchase the Poly Fill Beads as they were a little more expensive than I thought they would be, $9.99, for a 2-pound bag, without a coupon.   I went with a Minky fabric for both sides, as it is soft and similar to all of her current blankets she sleeps with. I read online that it would be hard to sew with but I had NO problem!  My blanket measures 30"X 40", which is the size of the nice baby blankets you find!


These next few steps seem very crazy and intimidating but I promise I if I can do it SO CAN YOU!

One tip I read online was WAIT UNTIL YOUR CHILD IS ASLEEP OR AT SCHOOL to do this project! I thought I can do this while my daughter plays in the playroom and I draw some lines on fabric. We'll I was WRONG!! I turn around and saw this!!

 
1.  The first thing you need to decide is what size you want your squares to be
I choose 5-inch squares as I knew my hand could easily fit down a 5-inch area and it also measured out equally!

2. You need to decide how much weight you plan on using in the blanket
Through lots of Pinterest research, I found the weight of a blanket should be anywhere from 10-15% of your child's body weight.  I spoke to a physical therapist friend about how much weight I should put in and she suggested 10% of my daughter’s weight and because she is small she said to add an extra pound. So, this made the weight that needed was 3.3 pounds.

3. Sew both sides of your blanket
Make sure you sew your blanket with fabric prints together. You will be turning this inside out after you sew these two sides.

4. Turn your fabric right side out and sew down your blanket every 5" or whatever size you have decided your squares will be

I suggest not sewing all the way to the end of each row as you will be folding over the fabric once completed to finalize your blanket.  Use your disappearing fabric marker or pencil to draw the lines down your blanket.  You can find the pen I used by clicking above on the tools you need section!


 5. Find the middle of your blanket and sew down the middle

I choose to sew down the middle so that I could easily reach my hand inside so I could push the beads and stuffing into place.


6. Figure out how much weight you will be putting into each square. You now need to divide it by the total number of square

I converted mine to oz as my scale didn't go as low for pounds as I needed it. I used a food scale to do my measuring and converted using Google!!

I per-measured at least five square totals out and placed them into plastic baggies so the process would go quicker once I got started!

7. Now onto stuffing each square with stuffing and Poly-Fill beads

Once you have done the following steps it is time to start stuffing! For each of your five (or more) rows, place the Poly Fill Beads in and then a small amount of stuffing, making sure to push everything all the way down to the bottom of that row. (Which is why I sewed mine in half) I did this for all five of my rows and sewed across all at the same time!  TIP: Use your marker and go ahead and mark out all the lines where you are going to sew! This speeds things up greatly! My pen had two sides, one which disappears by air and one with water. USE THE ONE THAT DISAPPEARS WITH WATER SO YOU DON'T HAVE TO RUSH as my air side disappeared rather quickly! If you use the water side you are able to draw lines for your whole quilt now, which is helpful instead of measuring it out while it was stuffed!


Measuring lines for the whole quilt


I used about this much stuffing for each square.

Once you have stuffed your rows go to your sewing machine and sew all the way across.

8. Continue step 6 till your whole blanket is stuffed! 

  9. Fold the ends of your blanket and sew together 


10. ENJOY!


10